Configure the display options for your forms on the application to find them immediately on your smartphones or tablets in the 'History' or 'Reception' box menus! Here you will see how to define a title and a dynamic subtitle for data located on your mobile in Sent (forms you have entered and saved) or the 'Reception' box (forms coming from a push or transfer between users). As well as renaming them, you will be able to sort or group them.
Step 1. From your Back-office.
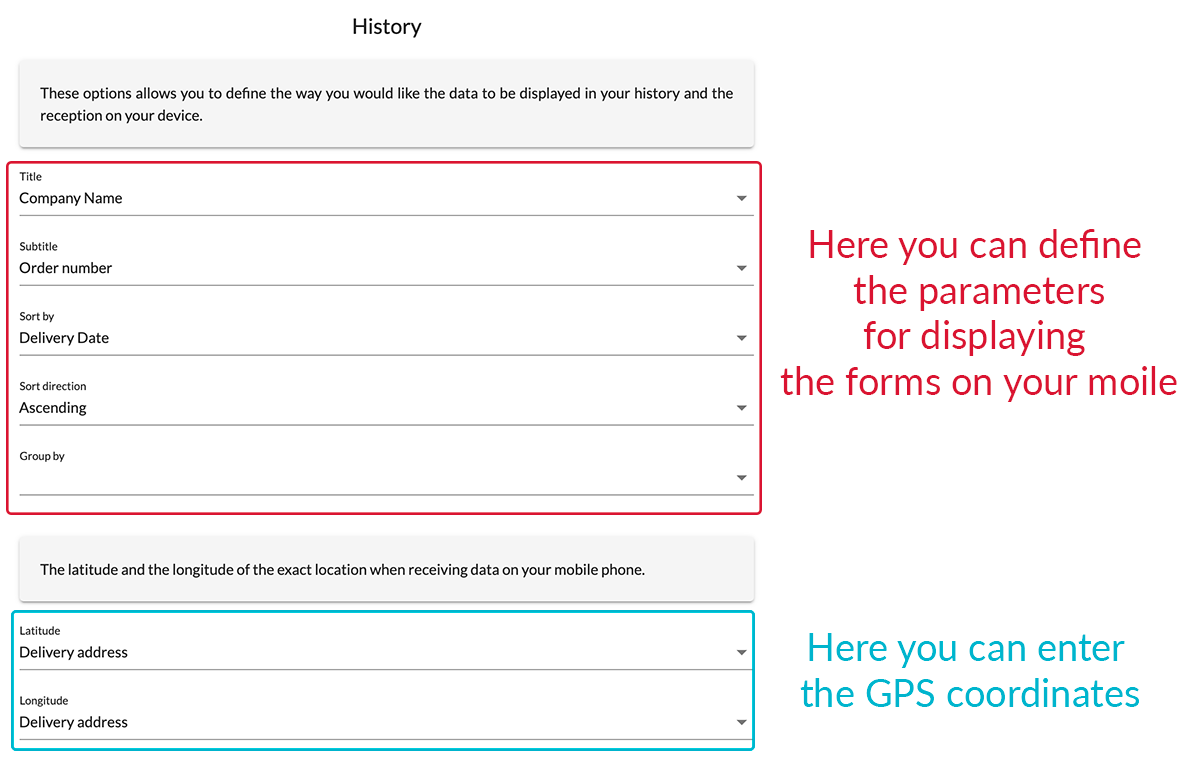
It is in this section that you can define the headings and sub-headings under which your forms will appear in the History as well as the 'Reception' menu of your mobile device.
- Go to the Forms tab.
- Select a form.
- Go to Options in the form and then to the History tab

Etape 2. Choose the display.
You can choose:
- The title and subtitle under which your forms will be displayed in the History and Reception menus of your mobile application.
.jpg?width=637&height=338&name=title%20subtitle-01-01%20(1).jpg)
- Ordered by: you can sort your data following an element of your form (town, project name, etc.). All you need to do is select the field you want in the scrolling Ordered by menu. Your ‘Follow project’ forms will be, in our example, sorted by city.
.jpg?width=200&height=444&name=Screenshot_20230130_153047%20(1).jpg)
- Sort direction: if nothing is chosen, the data will be organised in chronological order. However, you can organise your forms by ascending or descending. Below is an example from left to right: by default (chronological direction), ascending and descending.
.jpg?width=637&height=563&name=ascending%20and%20descending-01%20(1).jpg)
- Grouped by: you can group your data following a denomination (city, project name etc.) regardless of your forms if they have the same configuration.
.jpg?width=200&height=444&name=group%20by%20(1).jpg)
- Latitude and Longitude: only for the Received menu: if your forms contain GPS coordinates, they can also be incorporated to display your forms on a map. This function is only available in the case of Push. For more details, you can consult our tutorial on the mobile map.
.jpg?width=200&height=444&name=maps%20(1).jpg)
