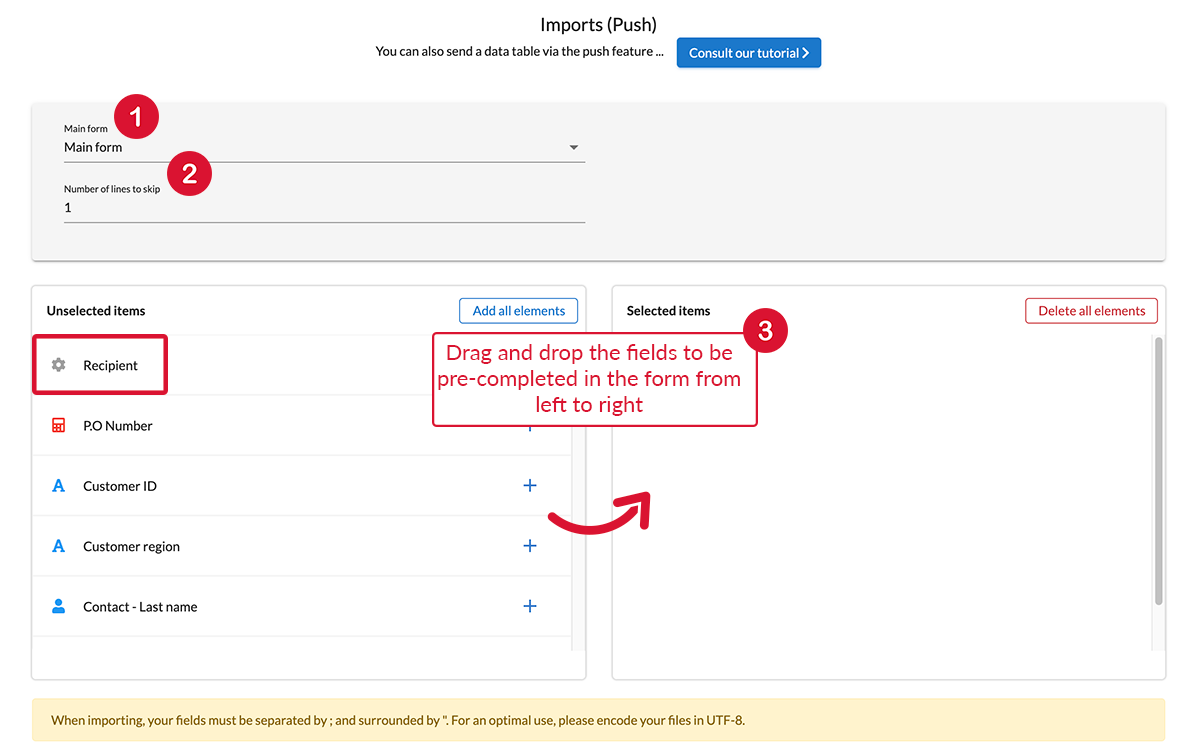
The import (Push) tab gathers options that define your import model to pre-fill form through CSV or Excel file. When you have lots of forms to pre-fill, we recommend this option. Much more practical!
- Go to your form general Options, then in the tab Imports (Push).
Pre-fill form: Set up the import model.
Here you will define your import Excel/CSV model to "push" data.
- Slide the fields to be pre-filled in the form from left to right.
Note: These same elements will be included in your Excel/CSV file. The order of fields must therefore be respected between this parametrisation process and your Excel/CSV file. Note: The first field is ' Recipient', and in your Excel/CSV file the first column will also be "recipient". The recipient corresponds to the user ID.
- Fill in the number of lines to ignore on Excel/CSV. As a general rule, it is the first line that corresponds to the titles given in each column. The computer will not take this line into account.
- Save the form after parametrising your options, so that they can be taken into account.
Note: If you want to ‘push’ data in a Table, you can do it via the Web entry, the Advanced Push or via the Web Service (API Rest).
Discover how to send your pre-completed forms from the office to the mobiles of those working for you, and follow the status of your messages. Please refer to the tutorial on the push.

