Did you know that you can store and classify your reports generated with Kizeo Forms directly in your Dropbox account? It means that when you are done collecting data on your mobile device, you can choose to have your custom reports stored and organized automatically and instantly on your Dropbox account. You can even create files and sub-files just by configuring previously your form on your platform.
Linking Kizeo Forms to your Dropbox account takes a bit of configuration. Let's go through all the different steps together!
Configuration.
First, it is important to link your Kizeo Forms account with your Dropbox.
You just need to define which document(s) will be stored and where. Meaning that you can choose in which folder the files will be saved and how they will be named. It is possible to create sub-categories in your folders. To do so, you need to insert the following symbol: /
There are two options to set the organization of your Dropbox from Kizeo Forms:
- The first one is to configure it with fixed text.
- The other option is to configure it with tag(s). Indeed, you can add use one or several elements' tag to customize the name of the Dropbox file(s) that will be created.
Configuring with text
Let's take the example of the Delivery voucher form. We want that whenever a driver complete the digital delivery form on his mobile device, the reports generated to be saved and stored on our Dropbox account under the folder named 'Delivery voucher' and the subcategory '2018'.
- To do so, we will go into the options of the delivery form.
- Select the Dropbox tab.
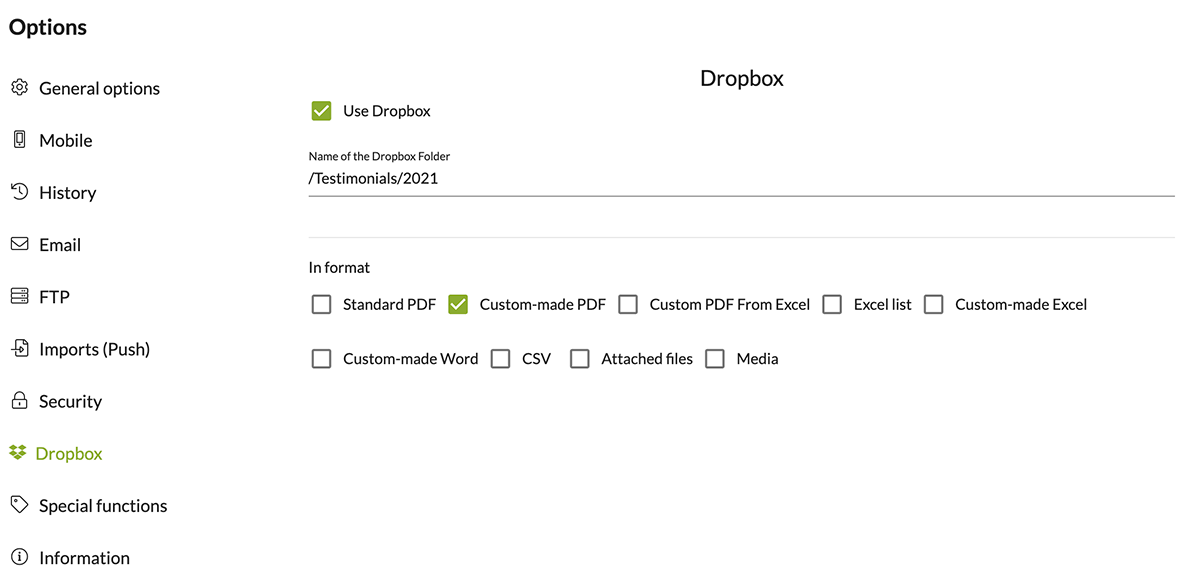
- Check the box called 'Use Dropbox' and enter the name of your Dropbox folder(s). The / symbol will generate a sub-folder. In our example, we will put Delivery voucher/2021.
- Select the format of the report(s) that will be saved. You can select several documents.
- Click the Save button of your form.

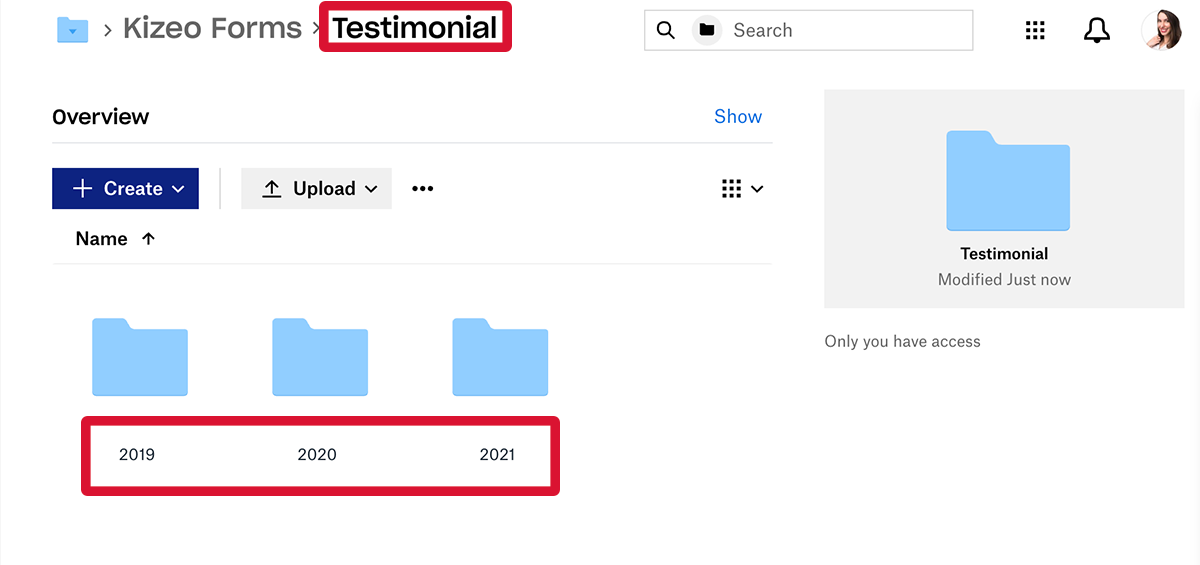
- Fill out your form and your reports will be stored automatically on your Dropbox account! In the example below, each export will be stored in subfolder 2021.

Configuring with tags
Let's take the same example of the Delivery voucher form. Except that this time, instead of putting text, we will customize the name of the folder and sub-folder by putting the tag of one or several element(s) of this form. For instance, we want to create the first folder with the name 'Delivery voucher' and the sub-folder to be named with the name of the company (client). Let's go through the different steps:
- First, we will select the 'Company name' element of our form to check what is its tag. It is ##company_name##.
- Click on the options button of the delivery form.
- Select the Dropbox tab.
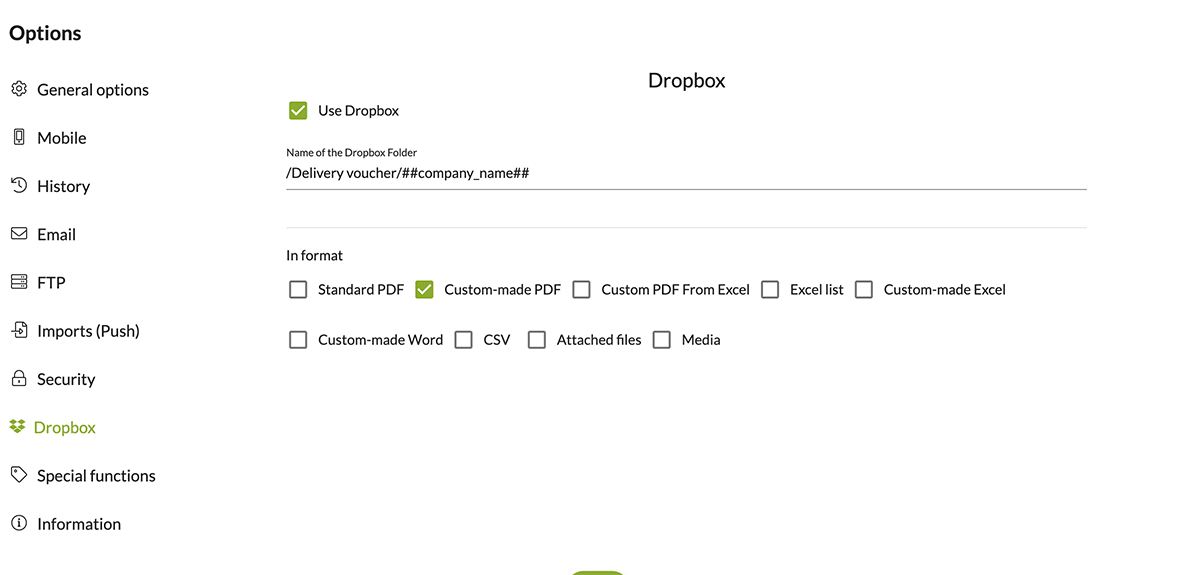
- Check the box called 'Use Dropbox' and enter the name of your Dropbox folder(s). The / symbol will generate a sub-folder. In our example, we will put Delivery voucher/##company_name##.
- Select the format of the report(s) that will be saved. You can select several documents.
- Click the Save button of your form.

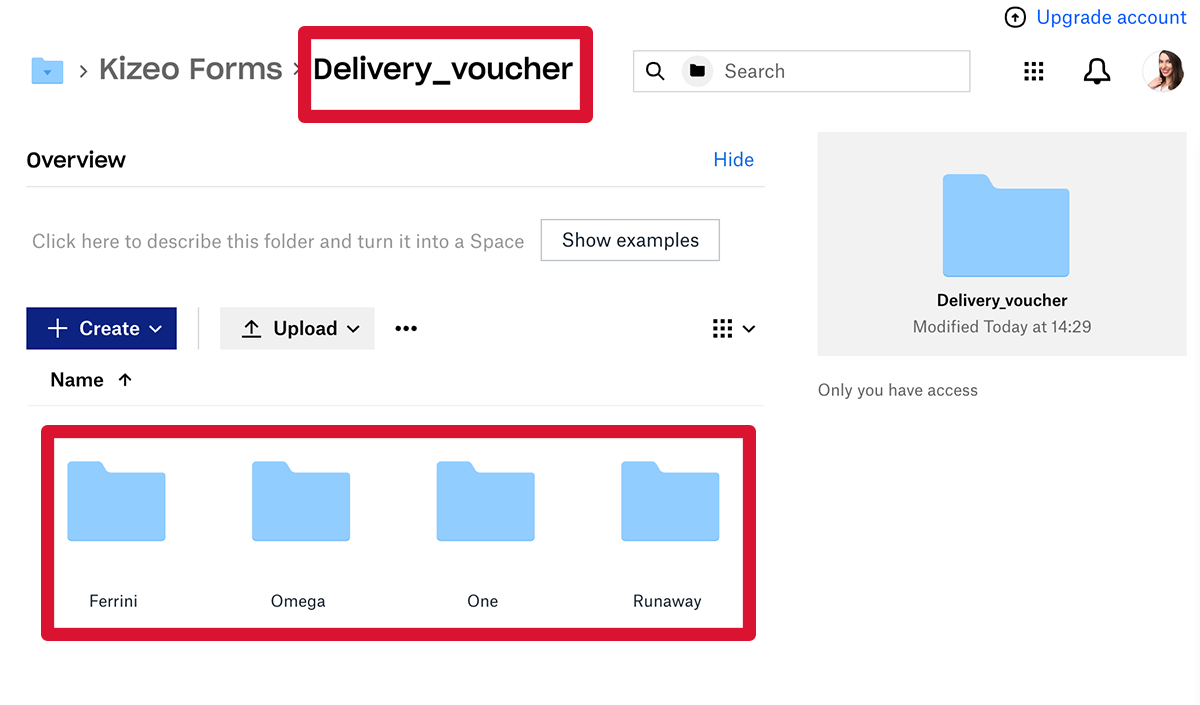
- Fill out your form and your reports will be stored automatically on your Dropbox account in the correct subfolder! In the example below, each export will be stored in the subfolder corresponding to the selected company.

