How to add users to your account
In the back office
1st Step: Verify subscription
To start, make sure that you have an available user. 
You can add users if you have not activated all your available users. In the Home page, you will find the information " 11 Active User(s) /11 Licence(s)" for example. This means that of the 11 paid users, 11 are active.
If you have activated the maximum number of users, you must take out a new subscription.
- Go to the administration interface -> subscription or from your online platform, click on My account settings under My administration interface, and then click on subscription
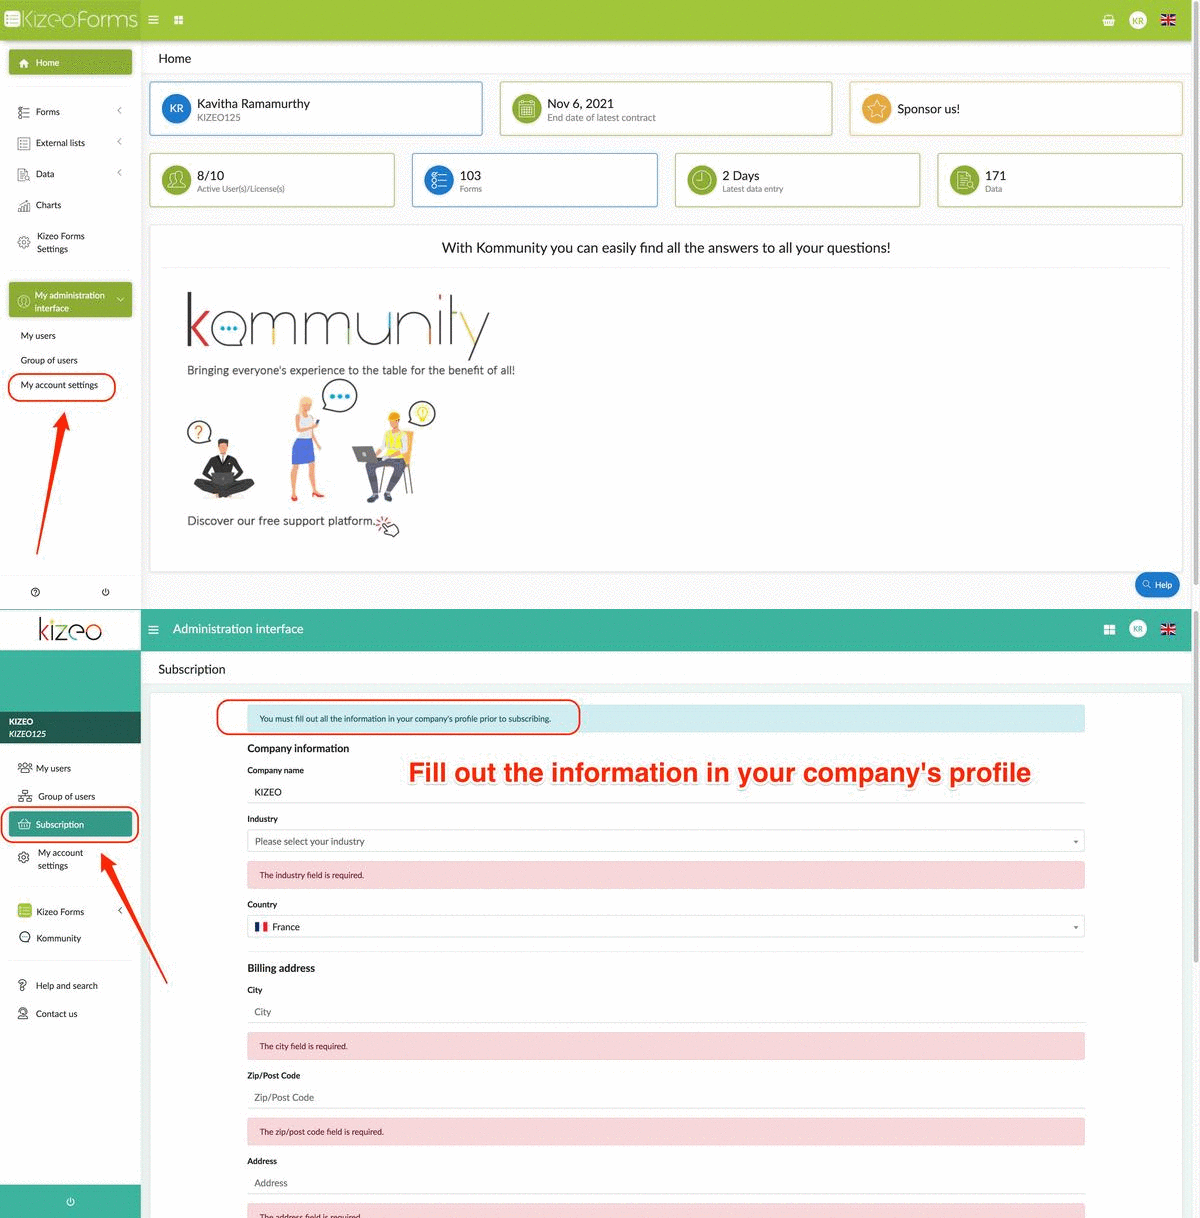
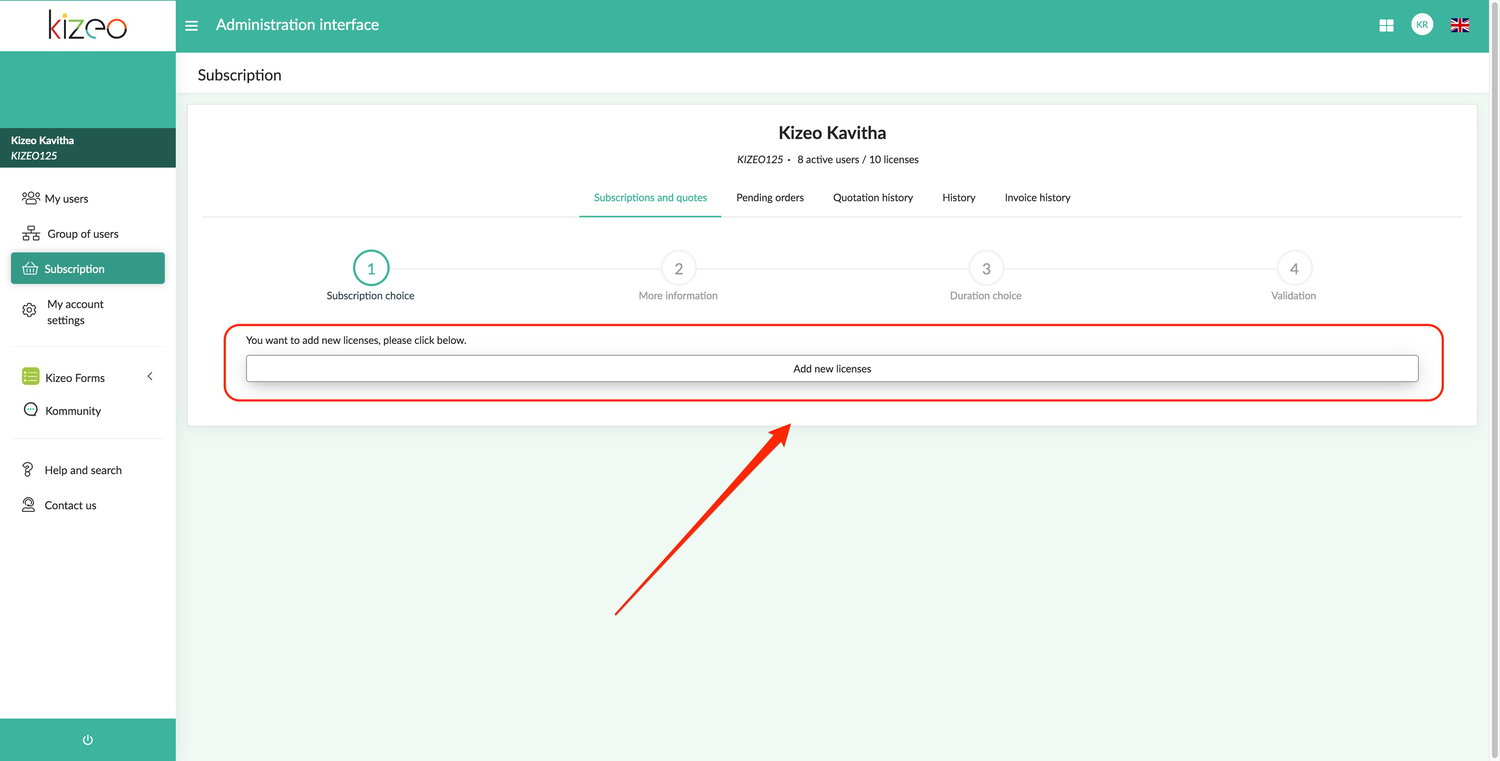
- Click on Add new licences.
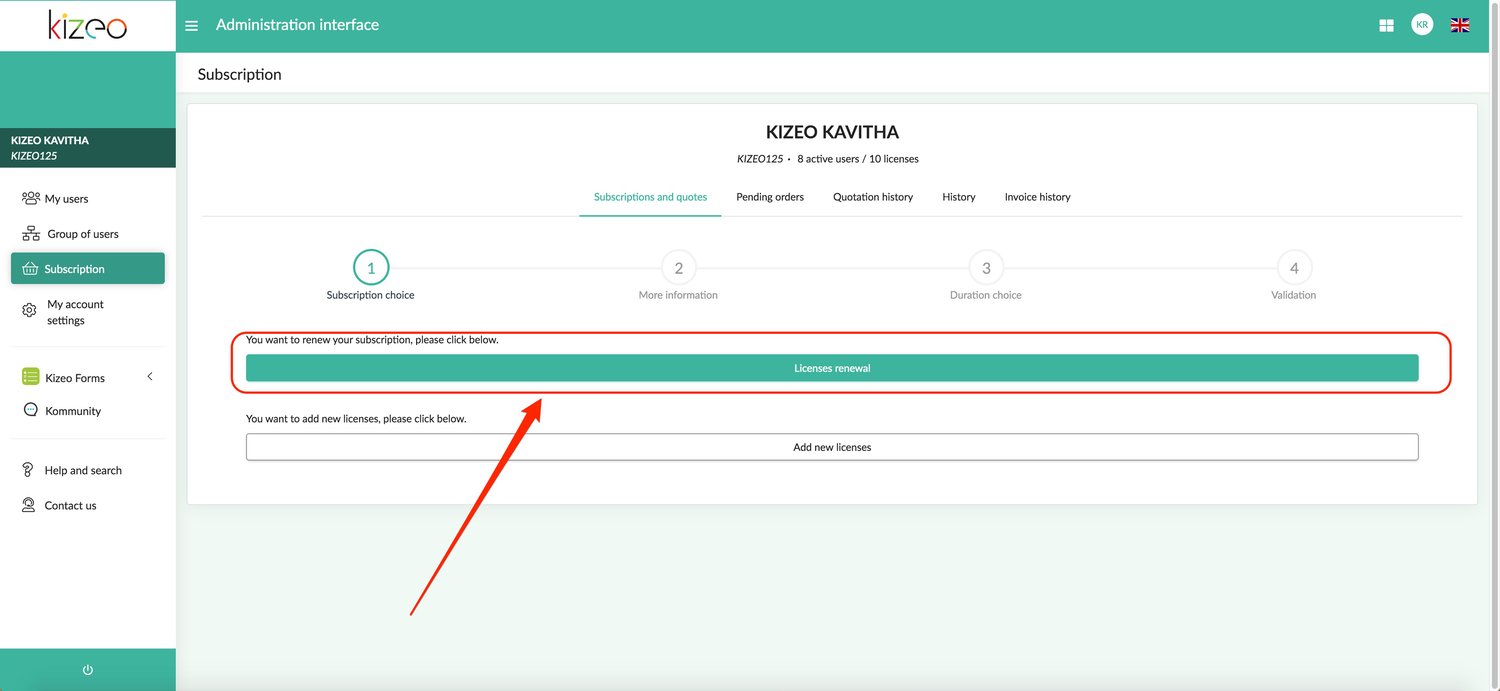
 Note: You can renew your subscription by clicking on Licences renewal.
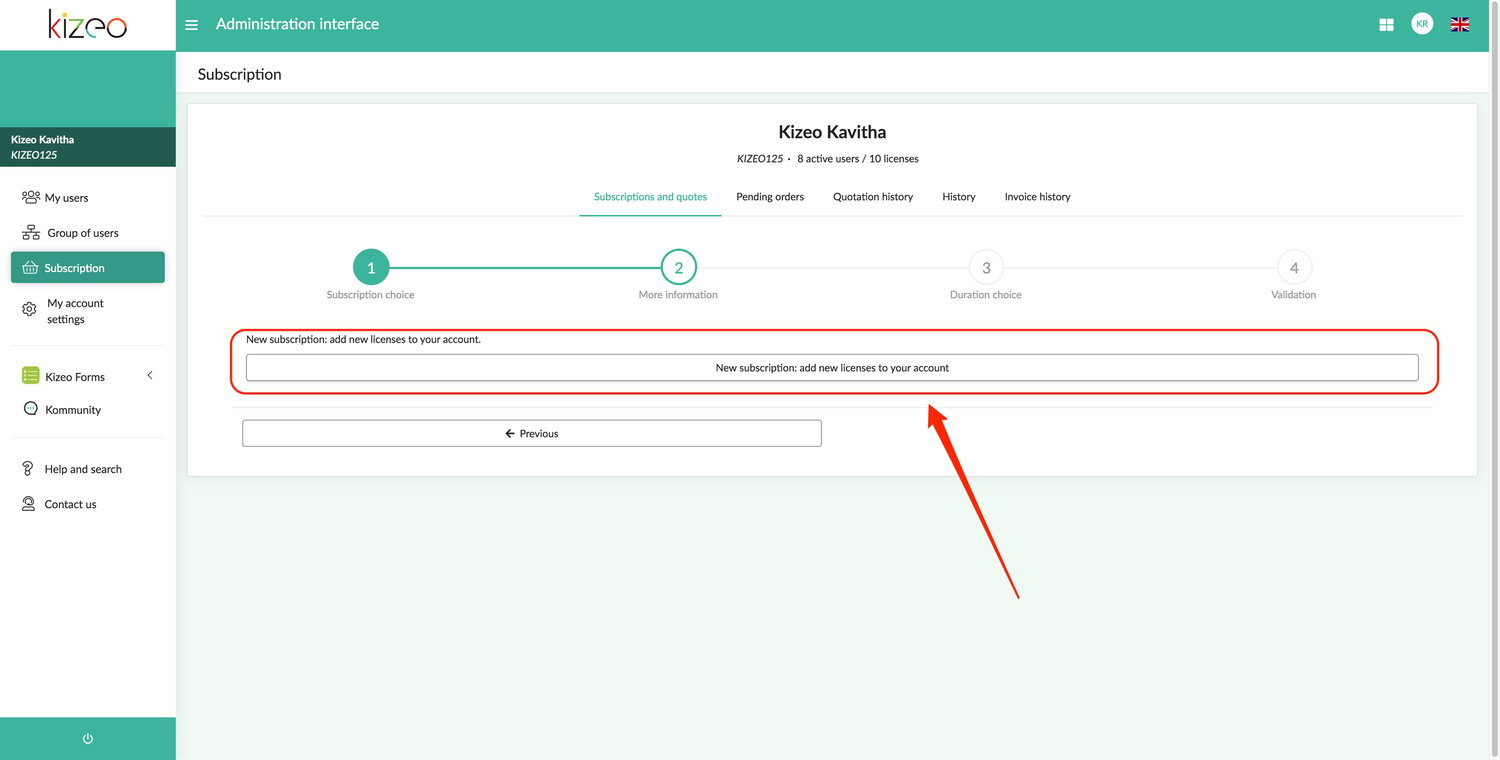
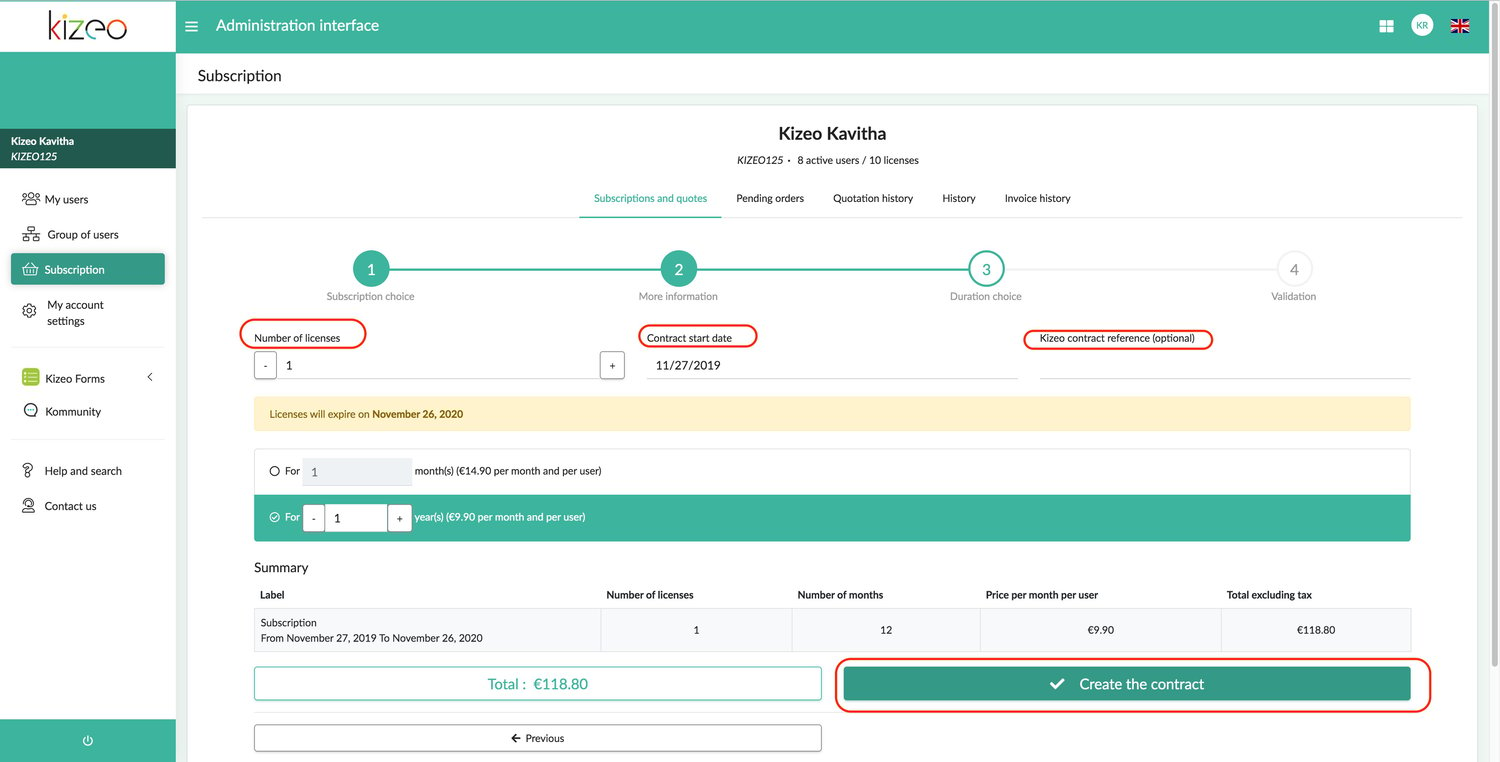
- If this new user is occasional and you wish to make one or more complete months without coinciding with the current end of contract date, click on "Add new licenses on your account".
- The number of licences that you type in corresponds to the number of users that you wish to add.
- You can choose the contract start date: - "For x months" allows a full monthly contract. This can occur in the middle of the current contract as there is an increase in activity for a few months. - "For x years" allows a subscription for a full year.
- You can add a reference.
- Pressing Confirm will take you to the page where you can Proceed to the checkout or Get a quote.
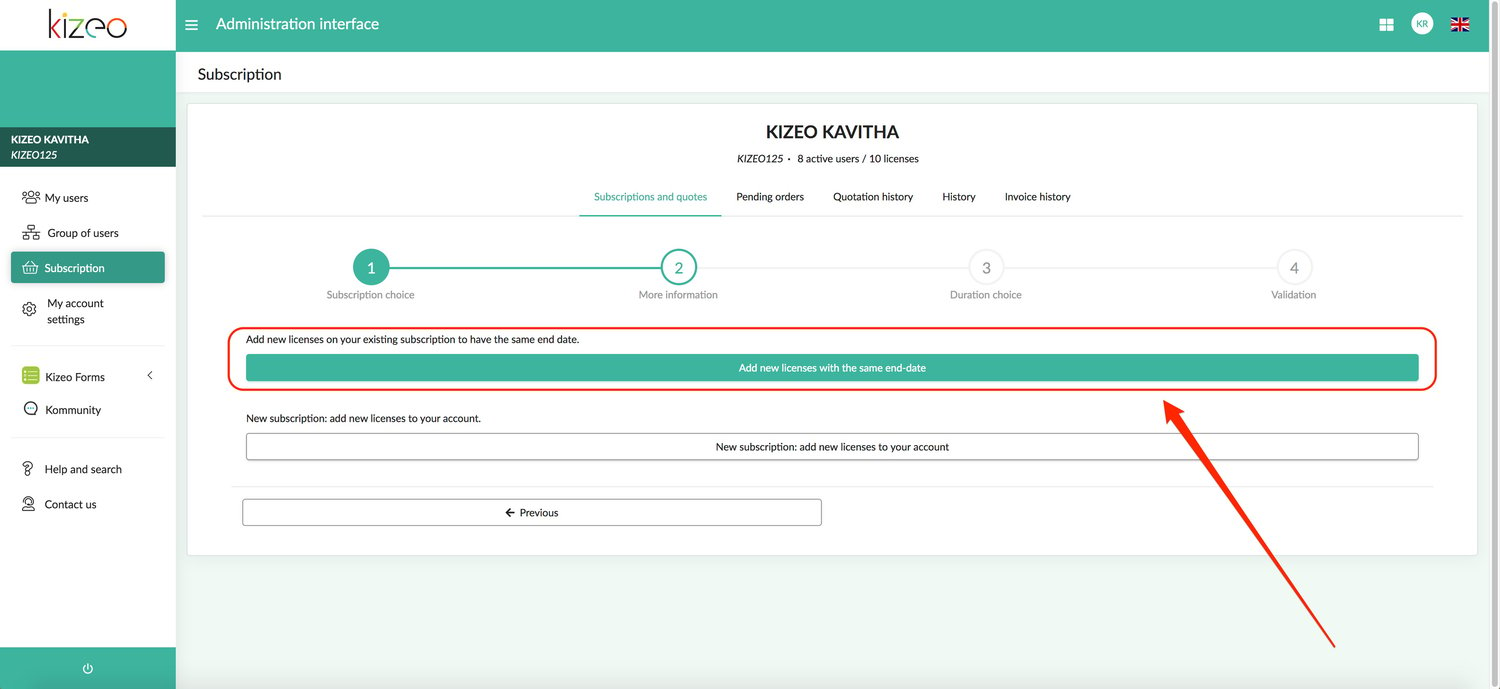
- If this additional user's contract must have the same end date as your initial contract, do "Add licences with the same end-date".
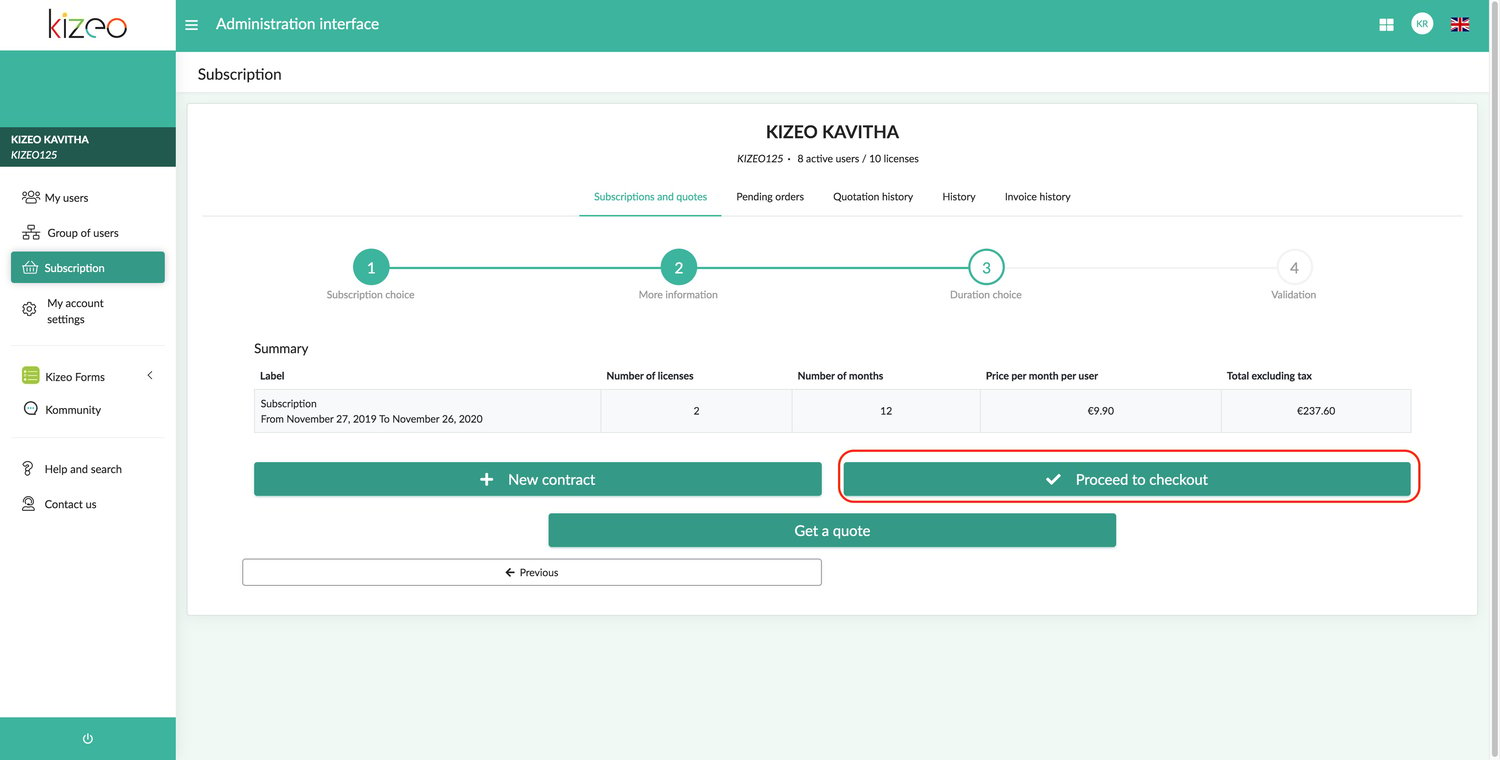
 The number of licences that you type in corresponds to the number of users that you wish to add. In this case, you wish to add 2 users.
- You can choose the start date.
- You can add a references.
- Clicking "Create the contract" will take you to the page where you can "proceed to checkout"or "get a quote"
 If you proceed you all see this page:
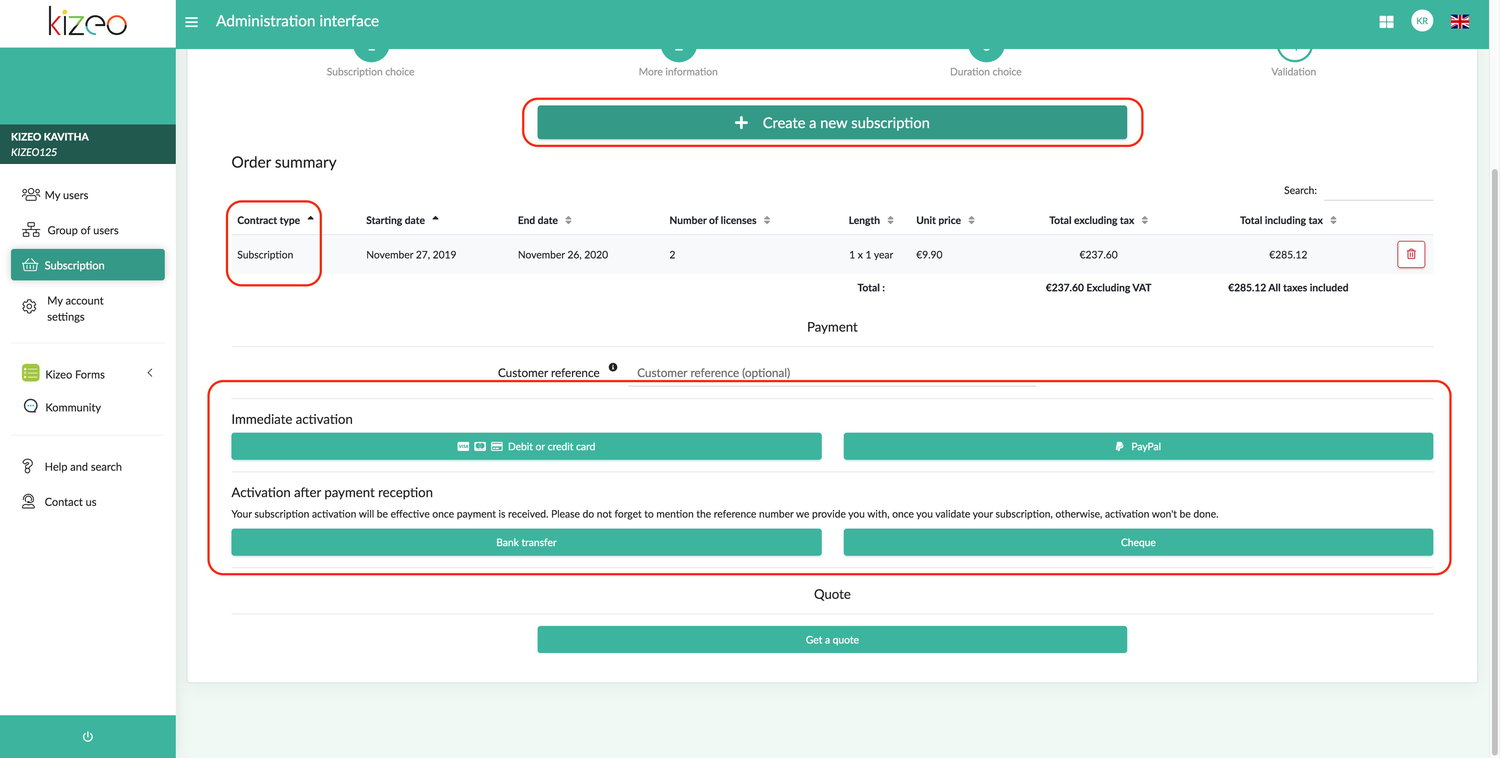
- Carefully check the information displayed before continuing.
- Continue ordering by clicking on create a new subscription or select the payment method you desire. (Paypal allows you to pay by credit card without necessarily having a Paypal account.) The licences will be activated when the Kizeo team receives the payment.
2nd Step. Create your user.
- Go to My Users under the My Administration Interface tab on the online platform or connect directly to the Administration interface and click on My Users
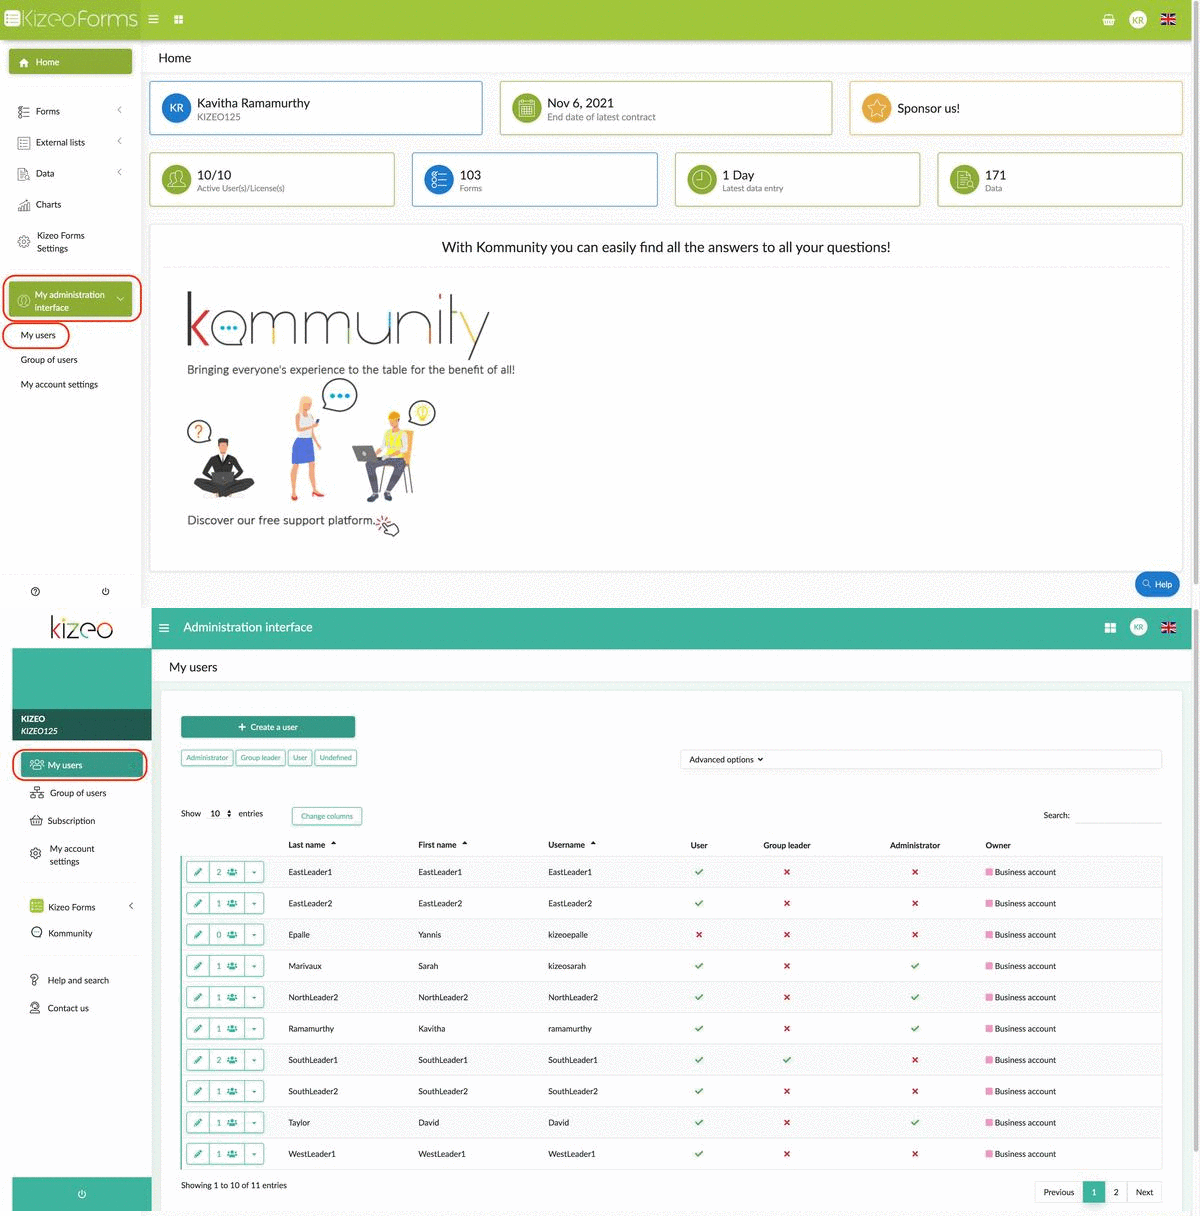
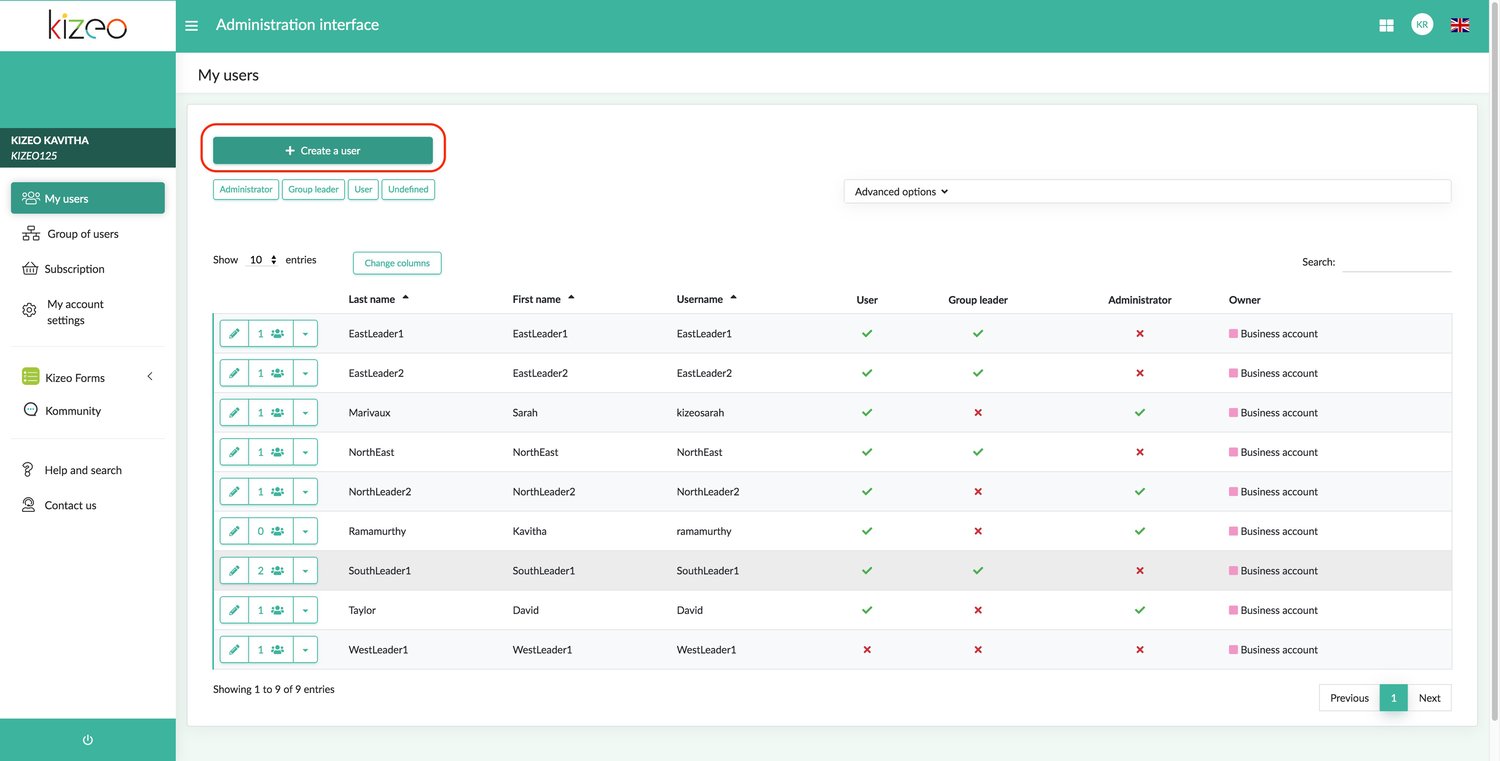
- Click on Create a user.
Complete all the available fields. Choose the username, the status of this user and the password. 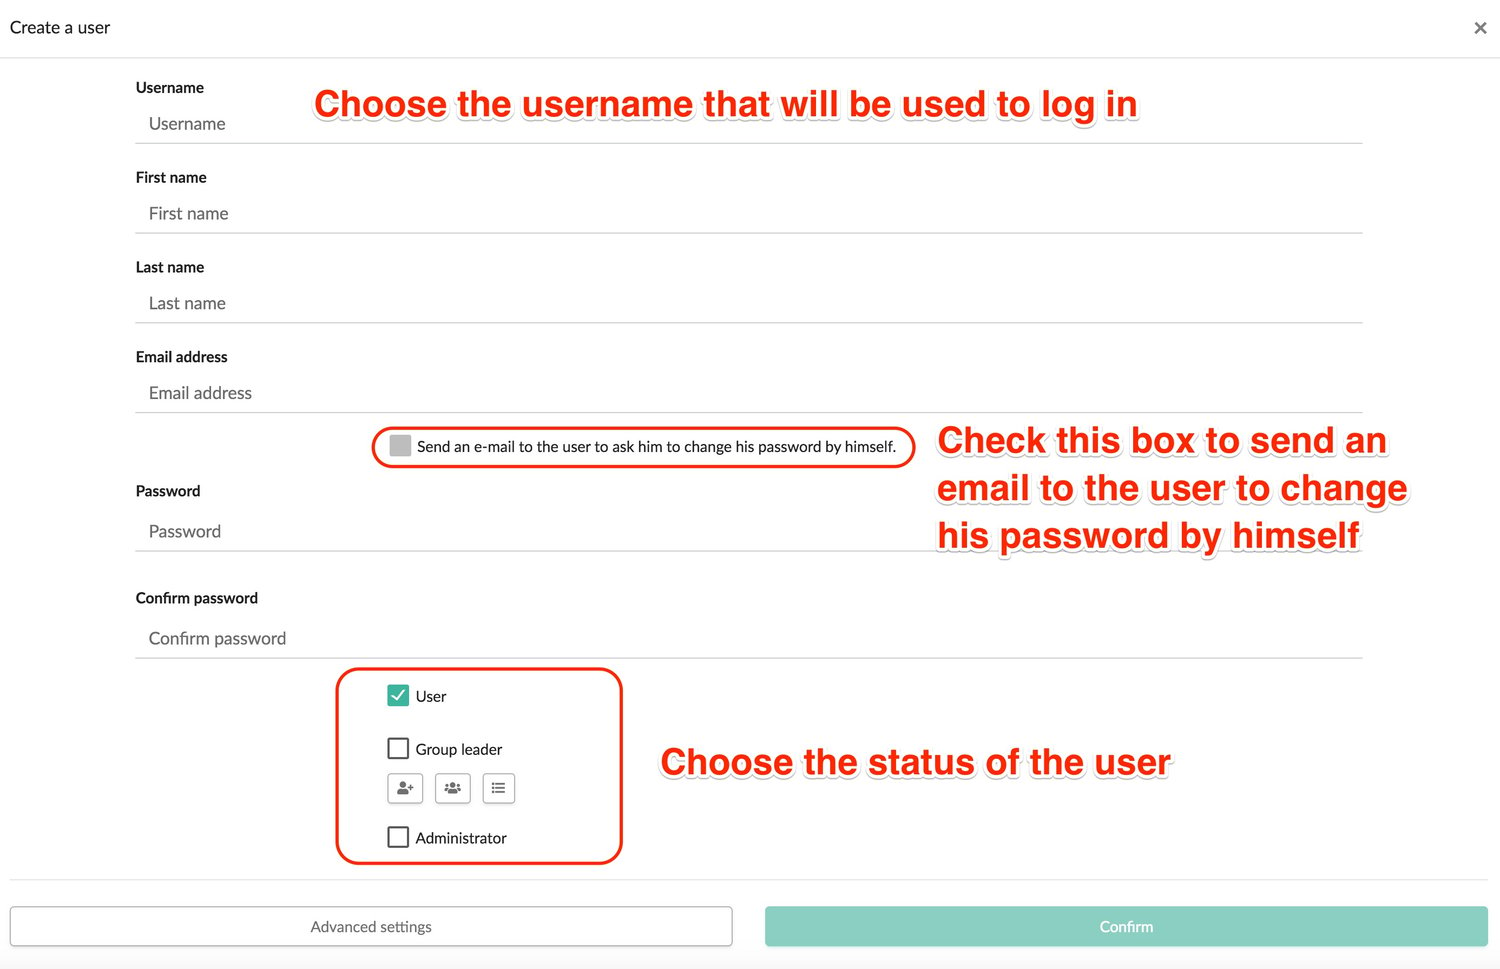
- Once you completed this first step you can either confirm it by clicking the Confirm button or go to Advanced Settings to put more details about this user. Even if you click Confirm now, you will still be able to add information later on by clicking on the green pencil icon to modify your user.
From the Personal Information tab, you can edit his profile, set your user's back office language, and add notes. 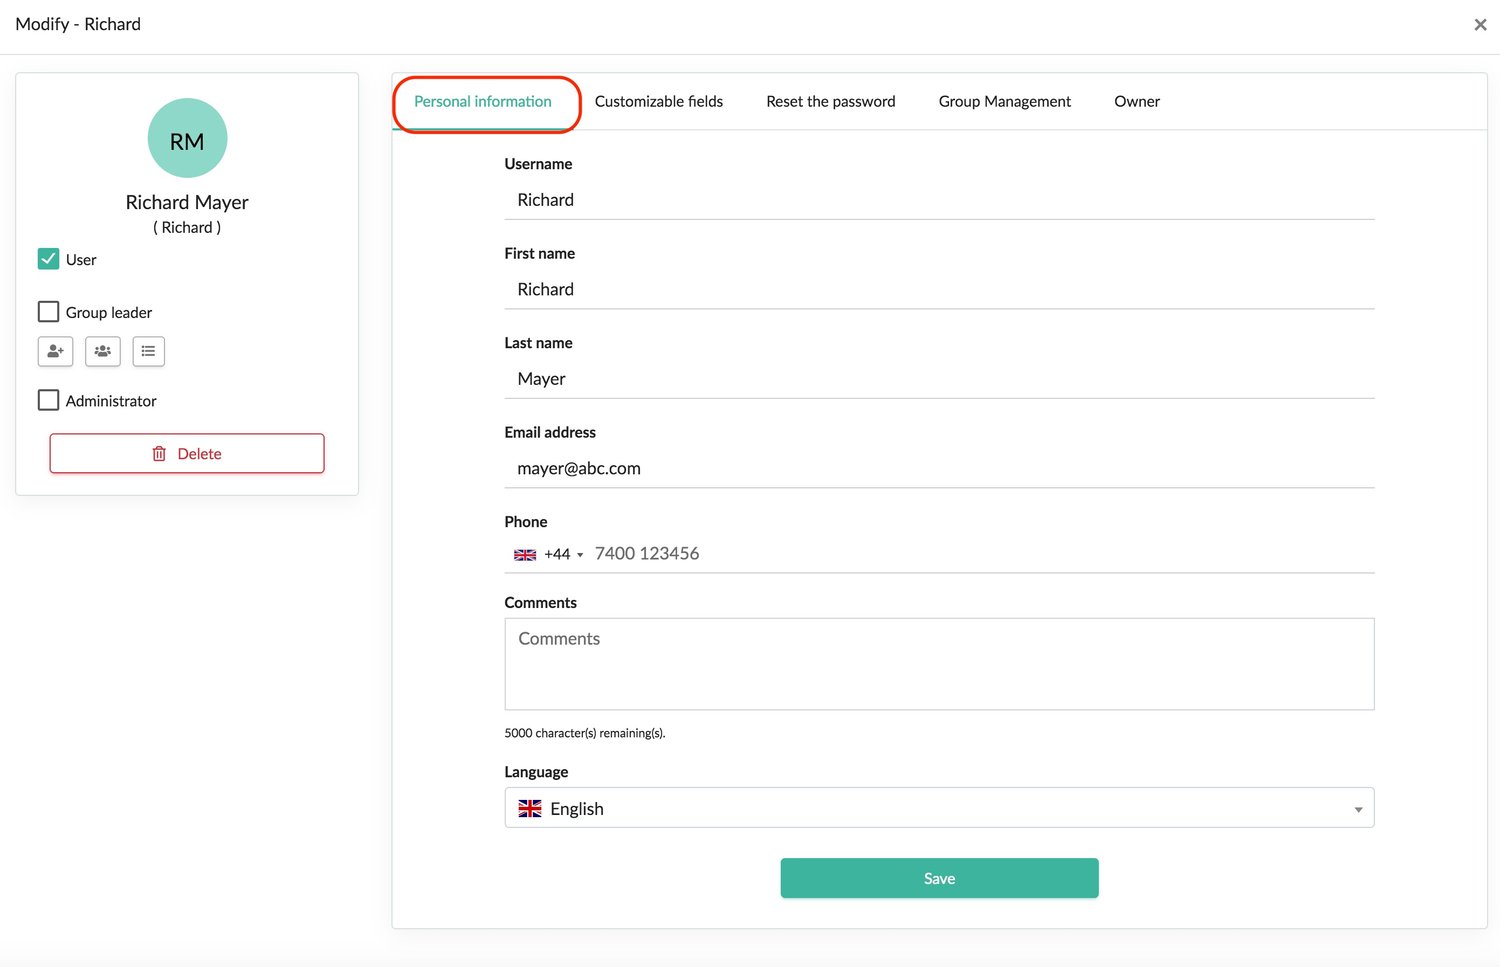 From the Customizable Fields tab, you can configure its custom user fields: Note: If no Custom Field is created, this tab will not be visible.
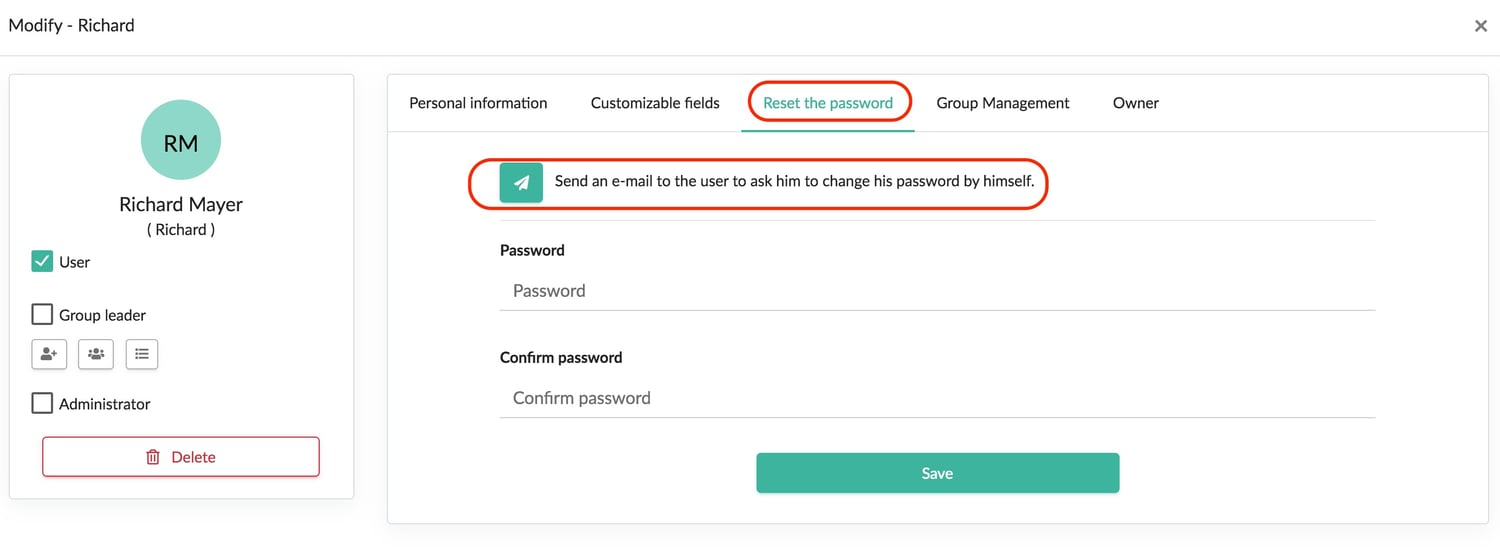
 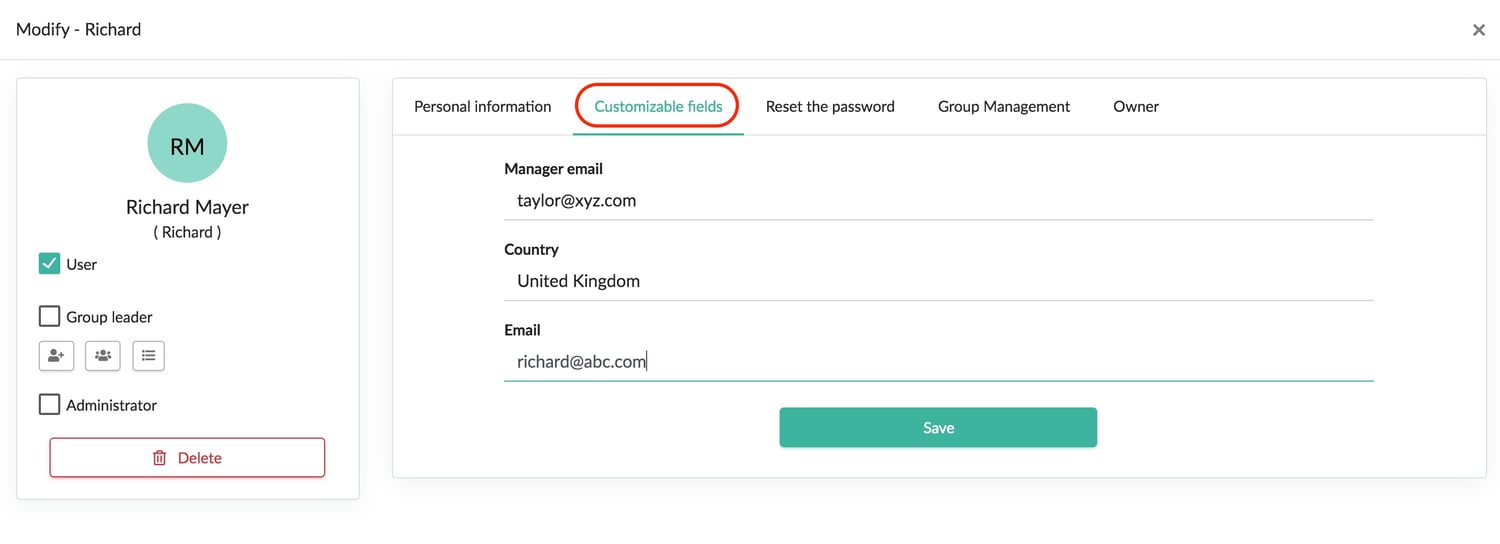 From the Change Password tab, you can change the password and / or send an e-mail to the user to define it himself
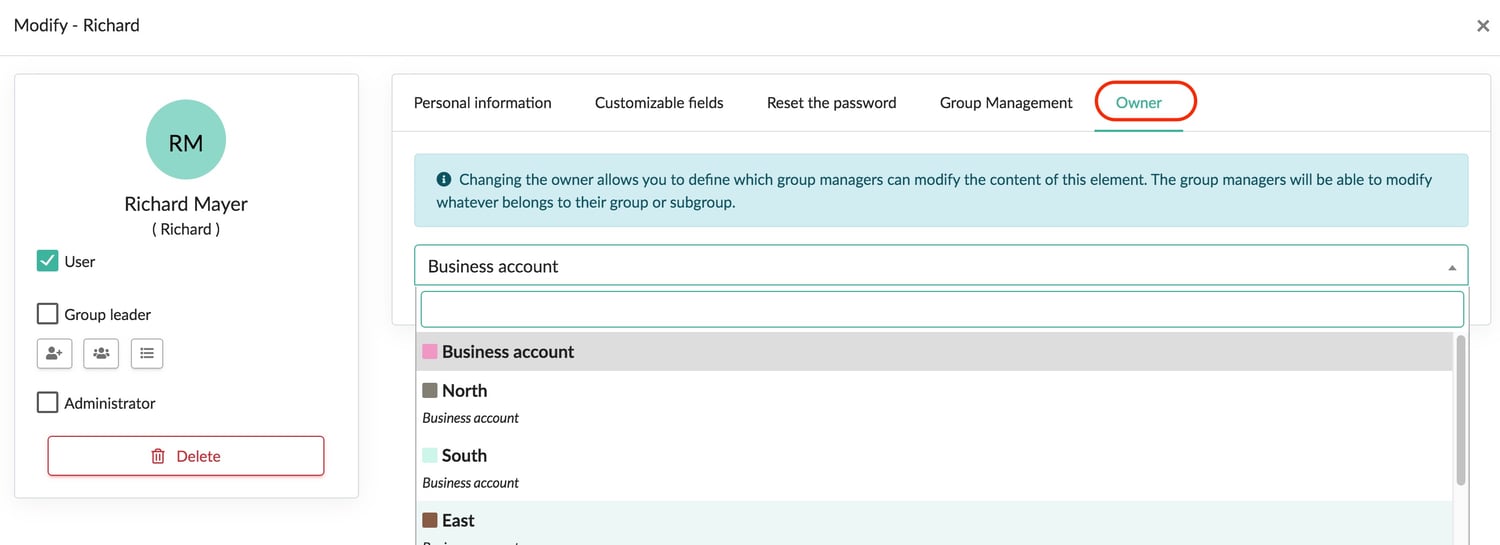
  From the Owner tab, you can define the group that owns your user's profile; in other words, group leaders who may have to modify this profile. For example, if the North group owns our user, all group leaders belonging to the North group will be able to modify this profile. On the other hand, if the Corporate Account group is the owner, only the administrators will be able to modify this profile.
  On the left hand side of the user profile, you can chose the status for the user:
1. User: He/she will be able to input data on his/her Kizeo Forms application, on Smartphone or Tablet, and also through web input.
2. Group leader: You can define the rights of the group leader by clicking on the icons below:
- By clicking this icon
 you will allow your group leader to create/modify users.
 - By clicking this icon
 you will allow your group leader to create/modify user groups.
 - By clicking this icon
 you will allow your group leader to create/modify forms.
You can define the main group of the user under the Group Management tab 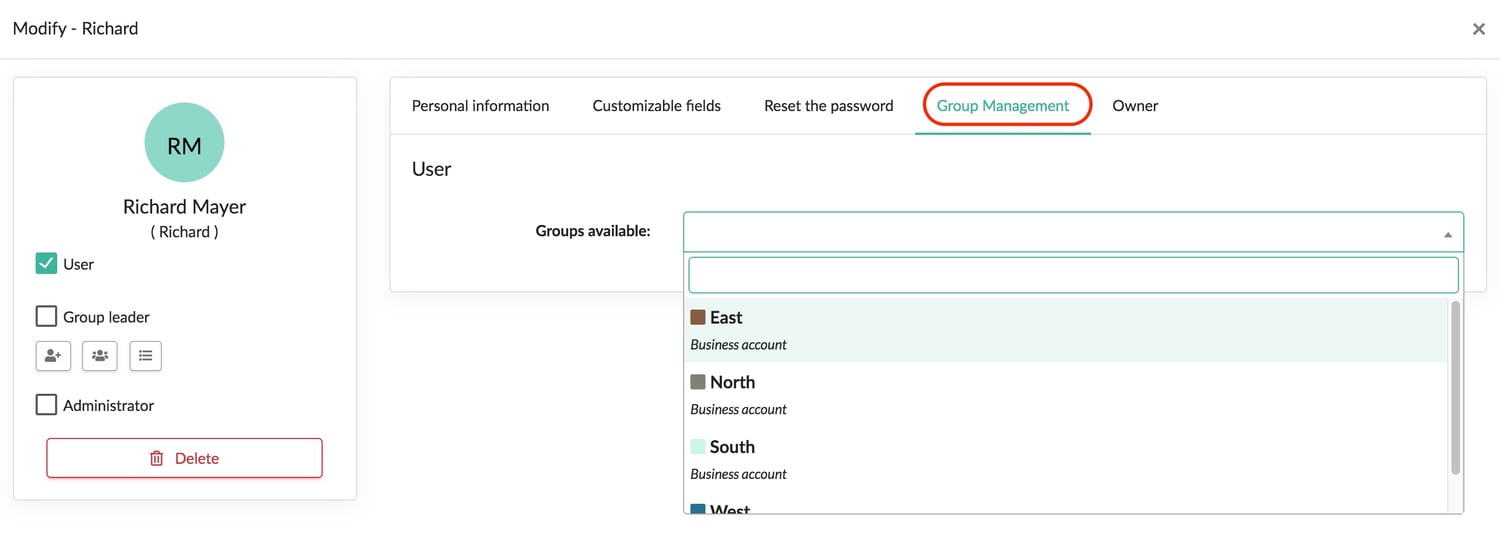 A group may have more than one group leader; therefore a group leader may manage several groups.
3. Administrator: Manages the Kizeo Forms account overall. It is the highest level.
Do not forget to validate. Your new user has been created! Think about giving him/her rights of access to forms !
