The Excel list is an Excel file where you can find all of your data for a given period.
You can create only one Excel list per form. You can export a standard list or a custom list. It is different from the custom-made Excel document.
For example, in order to facilitate the sorting of your data, you would like to be able to extract one or more data fields from the same Excel file. This is possible with the Excel list.
Retrieve your data in an Excel List
Export your data from the ‘Export’ tab
Note: Only preferred if you have a large quantity of data to export.
- In the menu under Data, click on the Export tab.
- Set the period for which you would like to retrieve the data by filling in the start and end dates.
- Check the “Include pending transfers” box if you want to include pre-filled forms sent to users through Push, which are not yet completed and saved.
- Click on Excel list to retrieve your data.
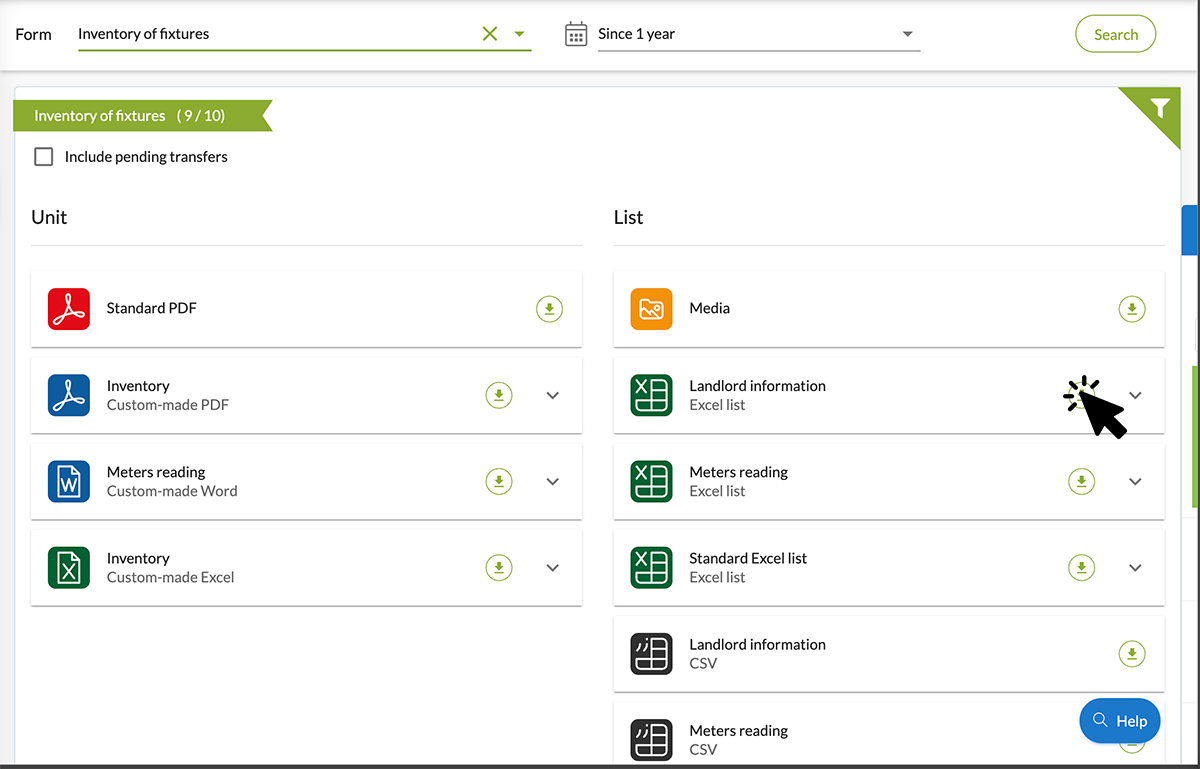 Export your data from the ‘History’ tab
- In the menu, go to Data, and under the History tab.
- Select the form of your choice under Select a Form. You will find all of the forms collected in the field by the several users of your account list.
- Simply select the data, and then, in the top right corner, click on the Selection button and Excel list.

Custom-made Excel list.
- Click on the Exports button on the top right of your form, then on List and finally on Add a new export.
- A window will open.
Field settings
This tab allows you to name your export template, the export files and also to organize the fields present in your Excel list. In order to configure your custom-made Excel list, simply drag and drop the desired fields from left to right. You can also display the column headers by checking the dedicated box. You will then obtain a personalised Excel list. 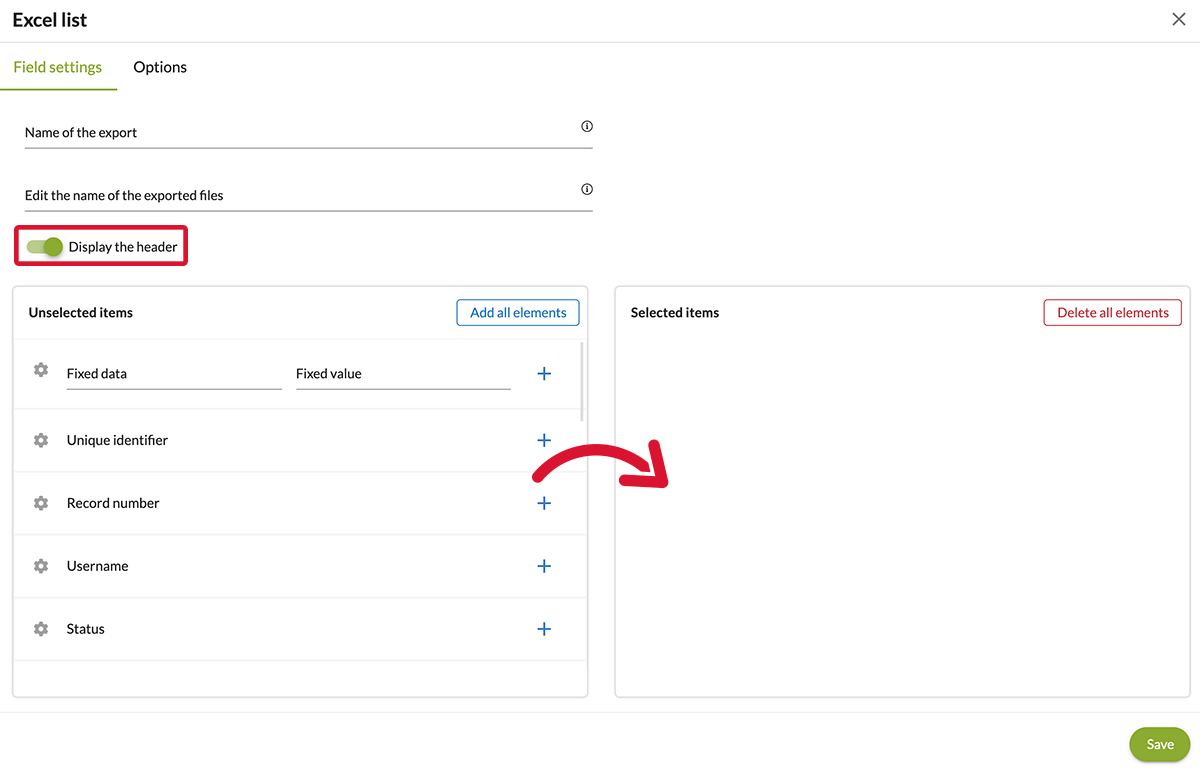 Options
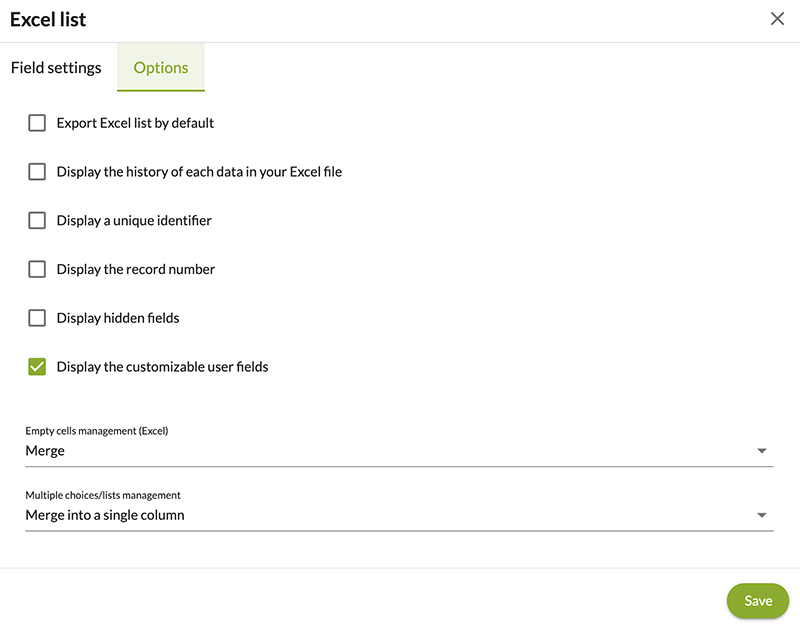
- Check the box Export Excel list by default if you want this custom excel list to be the one taken by default (for example for Drobox).
- “Display the history of each field given in your Excel file”: your Excel file list will include an additional “History” column precisely describing the history of the data: saved, transferred, edited data, by which user and on which date.
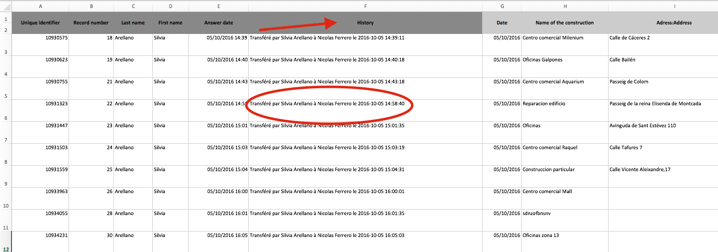
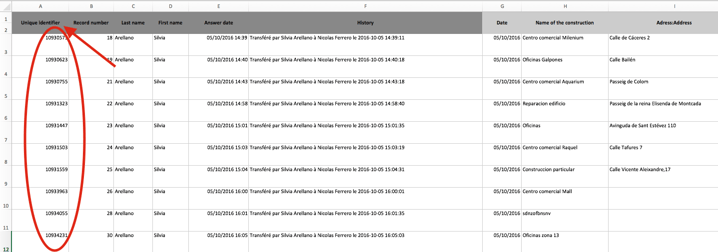
- “Display a unique identifier”: your Excel file list will include an additional “Unique identifier” column. This is the unique identifier of the data in Kizeo.
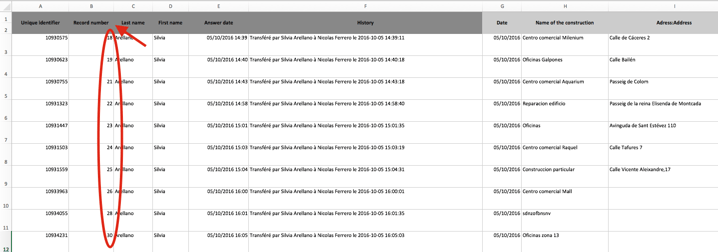
- “Display a registration number”: your Excel file list will include an additional “Registration number” column. The registration number is a number inherent to your form which starts with 1.
- “Display the hidden fields”: this allows you to display “hidden” fields in your Excel list based on a visibility condition.
- “Behaviour of empty cells (Excel)”: this allows you to decide if you want empty cells to be merged, duplicated or left empty. All you need to do is select the corresponding field in the scroll list: “Merge”, “Duplicate” or “Leave Empty”.
- “List behaviour/multiple choices”: this allows you to decide if you want the lists/multiple choices to be combined into a single column in the Excel file or, on the other hand, to be separated into several columns. All you need to do is select the corresponding field in the scroll list: “Combining into a single column” or “Separate into several columns”.
