Export your data in CSV format in order to retrieve all your data entered for a defined period. The data is "compiled" in the same file, in a list; each field is separated by a semicolon.
For example, in order to facilitate the internal processing of your data, you would like to be able to extract your entries into a single CSV file.
Retrieve your data in a CSV file
Extract your data via the Export page
Note: Only preferred if you have a large quantity of data to export.
- In the menu under Data, click on the Export tab.
- Set the period for which you would like to retrieve the data by filling in the start and end dates.
- Check the “Include pending transfers” box if you want to include pre-filled forms sent to users through Push, which are not yet completed and saved.
- Click on CSV to retrieve your data.
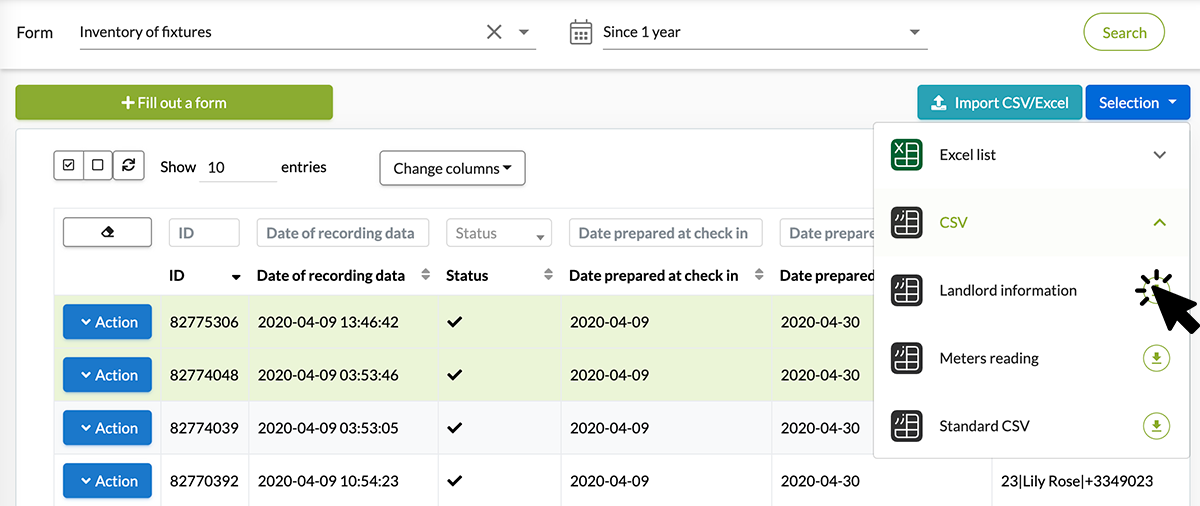
 Export your data from the ‘History’ tab

- In the menu, go to Data, and under the History tab.
- Select the form of your choice under Select a Form. You will find all of the forms collected in the field by the several users of your account list.
- Simply select the data, and then, in the top right corner, click on the Selection button and CSV.
 Custom-made Excel list.
- Click on the Exports button on the top right of your form, then on List and finally on Add a new export.
- A window will open.
Field settings
This tab allows you to name your export template, export files and also to organise the fields present in your CSV.
To configure your custom CSV, simply drag and drop the desired fields from left to right.
You can also display the column headers by checking the dedicated box. You will then obtain a personalised CSV.  Options

Presentation of the different options for the CSV format : 
- Check the box Export CSV by default if you want this custom CSV to be the one taken by default (for example for Drobox).
- CSV Windows format (recommended to open the file with Excel): This allows you to read a CSV file in Windows Excel format.
- Empty cells management (CSV): this allows you to decide whether you want empty cells to be duplicated or left empty.
- Separator: you can decide whether your data should be separated by a comma or a semicolon.
- Enclosure: select the character that will surround the values.
- Date format: Select the desired format.
- Decimal separator.
What is the difference between separator and delimiter?
Let's take the example of a typical site supervision report form. We enter in the same data: "Abby Smith" ( in our Project Manager field) and "Carl Davis, Cassie Jones" (in our contractor field). By default, the information will appear like this in our CSV: Abby Smith, Carl Davis, Cassie Jones. However, how do we know which name corresponds to which position? To do this, you need to set up a separator and an enclosure.
Thus, if we define " as en enclosure and , as a separator, our data will come out like this: "Abby Smith", "Carl Davis, Cassie Jones"; we will thus be able to easily identify our project manager and our contractors.
The most common formats are :
- Separator:
,and an empty enclosure, - Separator:
,and"as the enclosure, - Separator:
;and an empty enclosure, - Separator:
;and"as the enclosure.
Do not hesitate to comment on this article! All your questions, comments and suggestions are most welcome!