BI Connector Getting Started Guide
Prerequisites:
- Minimum knowledge of how Kizeo Forms works,
- Knowledge of BI
The purpose of this guide is to familiarise you with the new interface of our BI (Business Intelligence) Connector.
It will be divided into two parts:
- Administration of the data to be exported,
- Connection to the BI database.
To access the BI Connector features, you must request them from your sales department.
Administration of the data to be exported
First, you need to select the forms whose data you want to retrieve in your reporting tool.
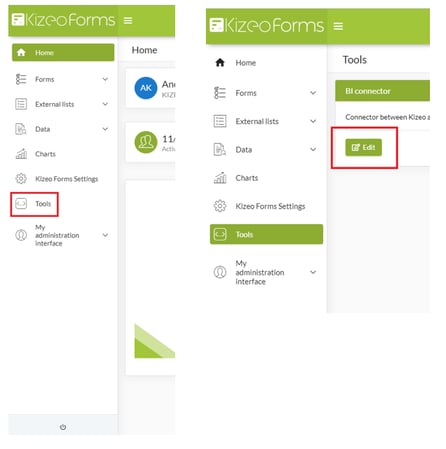
To do this, from the menu of your web platform, click on the Tools tab. From the BI insert, click on Edit.
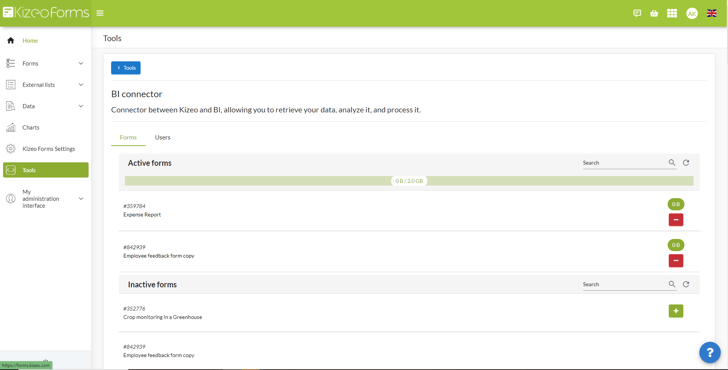
This brings you to the settings page. It has two tabs: the Forms tab and the Users tab.
The Forms tab
The Forms tab provides access to the complete list of forms in your company's account. If you have a large number of forms, we offer you the possibility to search for them by name.
On the right side of the page, + and - buttons allow you to activate or not the data recovery in your reporting tool.
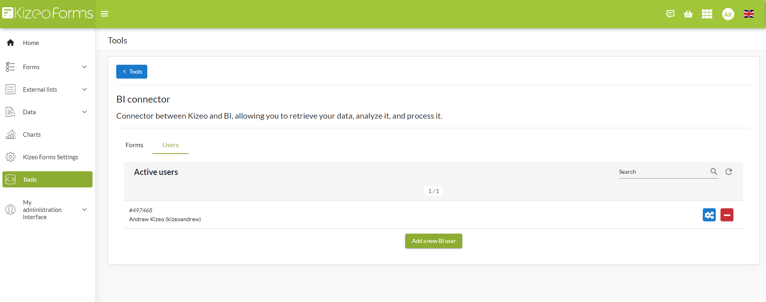
The Users tab
Here you can add or remove users with access to your forms. It is important to understand that Kizeo Forms rights are transferred to the BI database. Thus:
- A user will be able to view only their entered data,
- A group leader will be able to view the data of the users in the groups for which he is responsible,
- An administrator will have access to all the data entered.
It is now necessary to activate the user profiles that will have access to the data in the reporting tools.
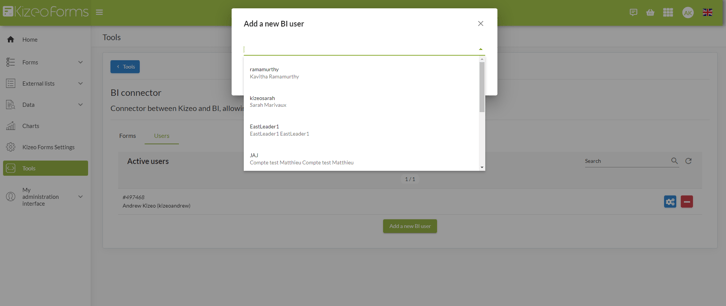
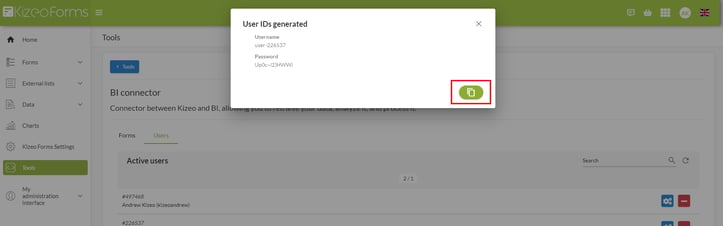
Add a user
- Press the Add New BI User button,
- Select the user you wish to add,
- Click on +.
A page will appear with your user's login and password.
Please note this password carefully: it will never be displayed again. You can easily copy it by clicking on the green button.
Manage a user
Did you notice it? On the right side of the user list there is a blue icon. By clicking on it, you will access the management options.
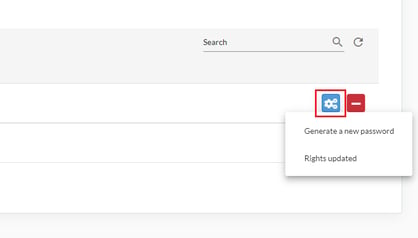
- The Generate new password button allows you to generate a new password. This means that you will have to change the settings for the database connection in the ODBC interface.
- The Updated rights button allows you to synchronise the rights of the Kizeo Forms user on the BI database. This action is necessary, for example, if the user is given access to a form already synchronised with the BI database.
The creation of your database will be effective only if the activated forms have data;
The addition of a form or a user can take up to 30 minutes before being present on the server;
It can take up to 24 hours before the actual size of the form data appears in the GUI.
Connection to the BI database.
To continue the installation of the Kizeo Forms BI Connector, it is necessary to install the MongoDB BI Connector.
Please note that you must download the version corresponding to your operating system. You will find all the download links for the latest version by following this link.
https://github.com/mongodb/mongo-bi-connector-odbc-driver/releases/
Installing the MongoDB driver in the ODBC manager
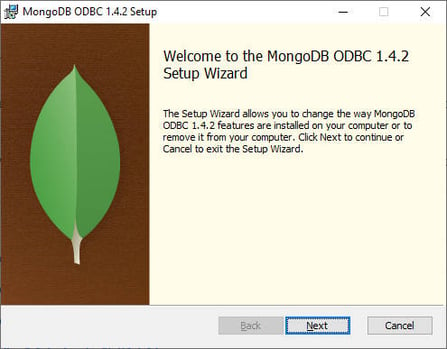
Check the box I accept the terms in the License Agreement and click Next.

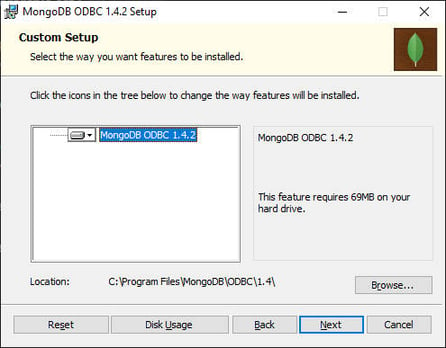
Click on Next.
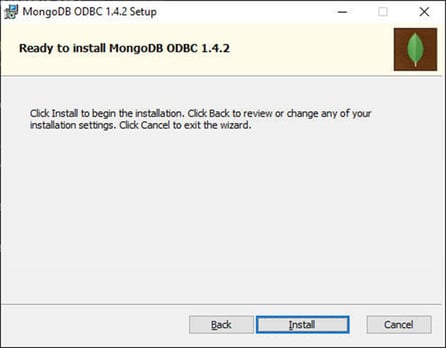
Click Install and wait for the installation to complete.
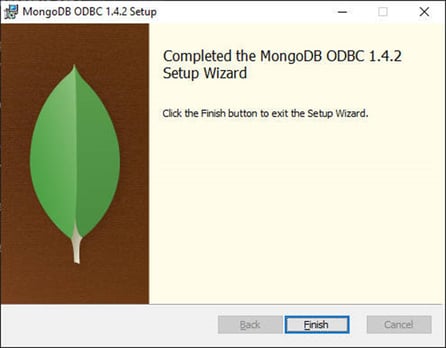
Click Finish. The MongoDB driver is installed in the ODBC.
- Setting up the MongoDB driver in the ODBC manager
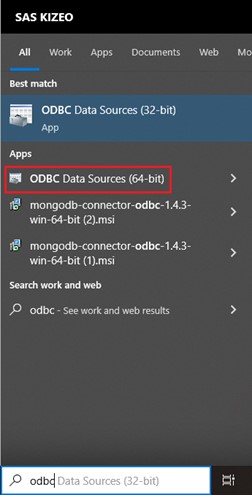
Click on the Windows icon (or press the key) and type odbc.
Select ODBC Data Sources (64-bit).
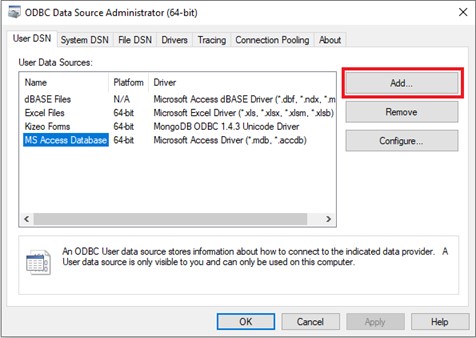
The manager will launch.
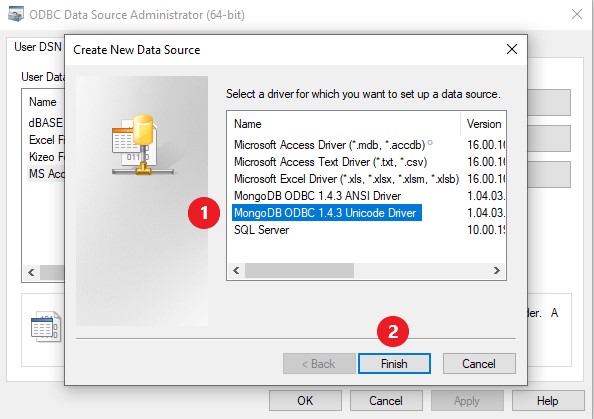
Click on Add.
A new window will open.
Select MongoDB ODBC 1.x.x Unicode Driver and click Finish.
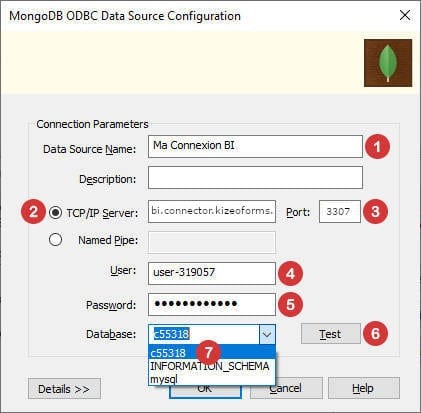
The window for setting up your connection will open. You must enter the following information:
- Data Source Name: Enter the name you want to give to your connection,
- TCP/IP Server: Enter the server address bi-connector.kizeoforms.com,
- For the port choose 3307,
- User: The user name in the form user-XXXXXX retrieved in the previous step 1.2.2,
- Password: Enter the password retrieved in the previous step 1.2.1,
- Now click on the Test button to certify that your connection is established.
- Click on the Database drop-down menu, the code of your database should appear on the first line. If so, select it and click on OK.
Your setup phase is over; close the data source administration window. You can now launch your BI software and set it up!